


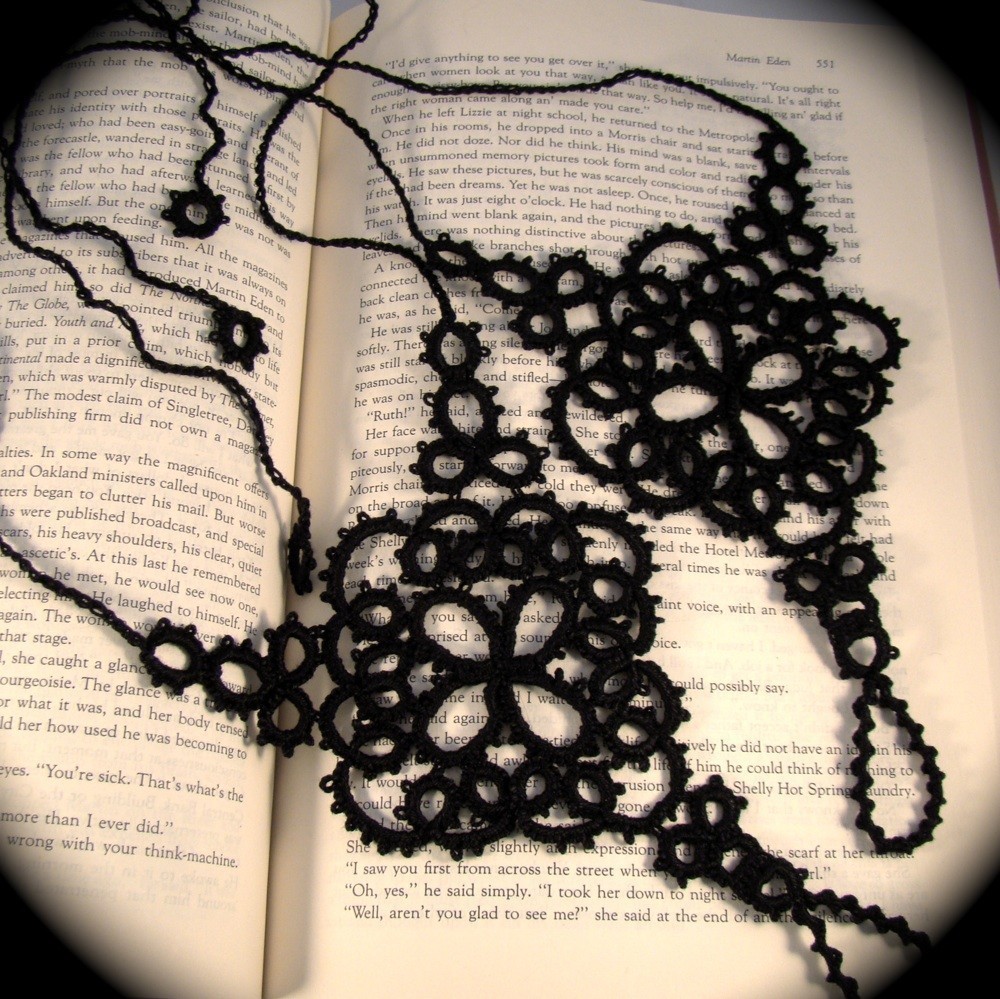
 The Queens Feet- Barefoot Sandals
 Size 10 crochet cotton, size 5 needle, size US7 crochet hook
Center:
4 rings of 5ds, p, 3ds, 9p sep by 3ds, p, 5ds close join each ring together by the 1st and 11th picot.
1st Round:
R 3ds p 3ds p 3ds join to the 3rd free picot before the join of the center ring, 8ds cl do not reverse, *R 8ds join to 3rd free picot of next center ring, 3ds p 3 ds p 3ds cl rw
Ch 6ds p 3ds p 3ds cl rw
R 3ds p 3ds join to 2nd p of last ring, 3ds join to next p of center ring, 3ds p 3ds p 3ds cl rw
Ch 3ds 6 p sep by 3 ds, 3 ds cl rw
R 3ds p 3ds p 3ds, skip next picot and join to the next picot of the center ring, 3ds p 3ds p 3ds cl rw
Ch 3ds p 3ds p 6ds cl rw
R 3ds p 3ds, skip one picot of last ring, join to next picot, 3ds join to next picot of center ring, 8ds cl do not reverse
Repeat from * around.
Corners, make 2 (see photo for joins to motif):
R 6ds join to motif, 3 ds 4 picots sep by 3ds, 3ds cl do not reverse
R 3ds join to last p of previous ring, 3ds 7 p sep by 3ds, 3ds cl do not reverse
R 3ds join to last p of previous ring, 3ds 3 p sep by 3ds, 3 ds join to p of motif, 6ds close, tie and cut
Straps:
R 3ds 8 picots sep by 3ds, 3ds close joining to the corner ring at the center 2 picots, tie, do not cut
Begin crochet chain of approx. 125 - 150 stitches at the close of the ring. Make chain shorter or longer for size or look. At the end of chain make R 3ds 8 p sep by 3ds, 3ds close, tie and cut
 Toe Loop:
Make Same as Corner but join the first ring to the 3rd picot of the 6-chain and the third ring to the 5th. Note: this is intentionally uneven.
Ring 3ds, 6 p sep by 3ds, 3ds close, joining to previous ring by center two picots, close rw
Josephine Ring of 140 stitches or as many as needed to make large enough loop, tie and cut
I've been emailing this to anyone who asked for so long, intending to eventually do up an Instructable, but I've not had the chance to take pictures for that. I will get around to it, I'm sure, but until then feel free to make as many of these as you like for personal use and gifts only please, though I could care less if you sell them locally, just not online if you'd be so kind, thanks.
If you have any questions or if I've made any mistakes, please do not hesitate to let me know. I've no illusions of pattern writing perfection. In fact I'm right awful at it which is why I do so few of them.
F.A.Q Update: To make the join for the center motif, first I make the last ring up to the final join, then I pull those stitches off the needle being careful to not pull the thread all the way through. Then I use a crochet hook to make the join and work the last stitches. Pull those stitches through, finish and close the ring.


36 comments:
So beautiful. Thank you for the tut.
I'd like to say thank you for you generosity in sharing your pattern. So Thank you!
Thanks for sharing the pattern. They are beautiful.
With everything you've got going on I'm amazed you have time to make your tuts available. Thanks so much- one day I'll get good enough to design my own things.
thank-you, thank-you,thank-you! This has made my day!
You are so generous. Thank you!
Your work is absolutely stunning!!!
I stopped by from Pearl's blog, The Beading Gem Journal...she did a wonderful post on you and your work!
I had to see for myself!!!
Cheers
I can't wait to try this, they're gorgeous. Thank you!
i have been waiting anxiously *but ever so patiently* for this pattern, once i got wind that it may be next up on your list of patterns to share. i just want to say THANK YOU THANK YOU THANK YOU THANK YOU!!!! these are so beautiful and are now on my list of upcoming projects!!
OMGosh thank you!! i want to make these for my gonna-be cousin for her wedding!!
Hi, I've been trying to make this, but I keep getting stuck with the first step (the 4 rings joined together): how do you attach the last ring to the first one? I can't figure out how to bend either the needle or the first ring in a way that will allow me to attach to the picot and do the last 5 ds.
Hi Angela, what you need to do is tat up to the join, pull the stitches off careful not to pull all the way, then use the needle to join to the first ring. Then tat the last 5ds and close the ring. It can be fiddly to do. You can also use a small crochet hook to pull the working thread through the picot...I hope that this makes sense.
Lovely! I made them and got so many fabulous comments! Thank you so much for sharing your pattern. They worked up beautifully with a shuttle.
I posted pics at intatters :)
awesome ok ok i give i must needle tat these your work is so amazing you make me want to create beautiful stuff myself
Thank you these are beautiful and perfect for a gift for a young person. You are so generous. Thank you
Thanks for the tutorial. How much tail thread should I have to start with?
Autumn...I honestly don't measure the tail thread at all, I just eye ball it. For the center, it's maybe a foot give or take.
I need your help, I don't know how to join the last picot on the fourth ring to the first picot on the first ring, (the last join of the round). Please help!! I want to convert this into a neckpiece, it's beautiful!!
@craftygma when making the last ring you will need to pull the stitches off the needle making sure to not pull the thread all the way through, then make the join and finish the last stitches and close the ring. You my find it easier to make the join with a crochet hook as well.
I hope that helps.
Thanks, I'll try that. I also thought about making the first round with a tatting shuttle, and the rest with the needle, I'll let you know which works for me. I really love your designs, have you ever thought about selling your patterns?
Good day - thank you for the pattern - how do i know what the abbreviations is for? Do you have a list somewhere on your page?
@Chrisi The abreviations are fairly standard for tatting. ds-double stitch, p-picot, cl-close, rw-reverse work, ch-chain, R-ring
is it a crochet needle or plain sewing needle - is the a link to a page where i can se the needle in full? Thank you
@Chrisi This is an intermediate needle tatting pattern, I have some beginners patterns as well as videos up on Instructables here: http://www.instructables.com/member/TotusMel/
That should get you started better.
It's amazing! maybe not the easiest one to LEARN needle tatting, but... I'm doing it :D
I just love that pattern!
I am use to making things myself but arthritis has taken over my body. My daughter is getting married and since the arthritis I cannot wear shoes I thought these would look better than bare feet. I was hoping you or someone else would be willing to make me a pair. If they could have the top just hook behind the ankle instead of the wrap ties since the are difficult for me that would be great, if not I will make due. If you are able to help please email me at amrcook@aol.com with your price and we can continue with this ceal. Thank you.
So size 5 needle, is that a knitting needle or a tatting shuttle? The pattern is gorgeous! Thanks so much for sharing!
@KraftyKaren The pattern is written for needle tatting, so it is a size 5 tatting needle. It may also be worked in shuttle tatting.
Thank you for sharing this beautiful pattern and the pictures on instructables. Made these for my daughter to wear at her wedding and she loves them. heh ya might of heard this before...learned to tat just so I could make these for her. Thanks again =)
I love this! I'm new to tatting, so some of the abbreviation I don't quite understand. Are you able to give a guide on what the abbreviations mean? I know ds means double stitch, but the others I'm a little lost. Thanks so much for an amazing free pattern.
You are super talented... Thank you so much for the beautiful pattern :)
I'm having trouble with the first round. It looks like I have petals behind the rings. I wish I could send you a picture. I must not understand where these rings go. Any help you can provide would be greatly appreciated.
@Carol Osterhoudt You can find more detailed photographs for this pattern on Instructables that might help: Instructables
I have never needle tatted. Won't the pattern work the same if I shuttle tat? They are beautiful and thank you for sharing.
@Misty Roberts Yes, it should work up just the same with the shuttle, the instructions are just needle specific.
Post a Comment