


We've had a pretty rough weekend around here. There's just been a whole lot of things adding up to create a stressful environment for our family. I don't really want to ramble on about it, but I did want to put it out there as a vague explanation for any odd behavior I may be unconsciously expressing.
Luckily before things starting piling up I did make and post the newest Armenian lace tutorial. This one is on the square loop with a little extra instruction at the end regarding adding new thread. I'm not certain what the plan is for this week's video, but if you have any requests do let me know. For now here's the video and I'm crossing my fingers that this weeks goes better than the last one.
Showing posts with label tutorials. Show all posts
Showing posts with label tutorials. Show all posts
Monday, February 13, 2017
Monday, February 6, 2017
Armenian Knotted Lace Video, The Second
Friday's plan worked out just fine and just in case you didn't see the video link on one of my other social media spots, here it is embedded for you. I did only the fancy single side stitch for this one, so it is nice and short. This week, when I get my quiet-home time, likely Friday, I'll do one on the square loop.
I also got an order in my shop yesterday for a large necklace, so I've got something that I really do want to remake this week. I started tatting on it last night while watching commercials, but it's going to take a few days I think, so a great start to the week.
I also got an order in my shop yesterday for a large necklace, so I've got something that I really do want to remake this week. I started tatting on it last night while watching commercials, but it's going to take a few days I think, so a great start to the week.
Friday, February 3, 2017
Today's Plan
Sorry, it was another achievement free day, unless you count getting the laundry done as an achievement. Yeah, no, me either. So instead of writing about yesterday I'm just going to focus on the plan for today. Once schooling is wrapped and kids have headed out with Grandma for lunch, I'm going to get the next Armenian lace video made and posted. Of course that's supposing everything goes according to plan. So if everything works as I hope, I should either have one video doing the next two stitches or two videos with one stitch each. It all depends on how long it takes to demonstrate each one. I want to keep the videos really short.
I won't post the video link here until Monday, but It'll show up if you subscribe to my YouTube channel and I'll post on my Facebook page, Twitter and post it on Instructables as soon as I get it done. So here's to today going as planned.
I won't post the video link here until Monday, but It'll show up if you subscribe to my YouTube channel and I'll post on my Facebook page, Twitter and post it on Instructables as soon as I get it done. So here's to today going as planned.
Monday, January 30, 2017
What's Next
 Okay, so let's see, Friday was the first full that my Armenian lace video was up and I had some lovely comments. a couple of questions to answer, and quite a few views. I guess it turned out okay then. Sorry I can't oblige with outtakes as I deleted all mistakes as they occurred. That is the joy of digital media after all. I used Friday to finally pin up the last of the gift doilies as well. It will sit here until the brother for whom it is intended visits again though.
 I also gave some thought to the next video. I have two more stitches mocked up and ready to go. I'm going to do the fancy side stitch as it will allow me to teach the knot stitch going from left to right, and then the square stitch with a simple loop row above since it's a completely different shape. They will likely be two different video as that lets me keep them short. Short is easier to make in one shot and I imagine easier to watch over when trying to learn something.
I figure after these two I'll tackle a multi-row stitch like the basket stitch and then making round lace. I don't have a clue as to the actual timetable here, but I'm thinking maybe once a week right now. We'll just have to see how my free time flows I guess. If you missed the first video it's here, or on Instructables if you prefer. When I have a few more I'll add them to the sidebar of the blog as well.
Friday, January 27, 2017
Armenian Knotted Lace Video, The First
I actually managed to do the video yesterday. Yes, I am surprised at myself as well. The kids were off in the afternoon with grandma and so I got everything together and made what will be the first in a short series of tutorials for Armenian knotted lace. This one is just getting started and teaches the Armenian knot stitch in a simple loop. I'm not going to tell you how many takes it took to get the video done, nor am I going to say how many were spoiled by cat and how many by my own cursing over mistakes. I just want to make sure that you know that I will be spacing out the videos a bit to keep my frustration level down.
So here is the video. You can find the it on Instructables too if you prefer. I hope that you find it helpful and it makes sense. I'm not sure what the next one will be on, likely a different stitch, but not sure which. No, I did not mean to rhyme that and I'm sorry.
So here is the video. You can find the it on Instructables too if you prefer. I hope that you find it helpful and it makes sense. I'm not sure what the next one will be on, likely a different stitch, but not sure which. No, I did not mean to rhyme that and I'm sorry.
Thursday, January 26, 2017
Just Starting
 Okay, I admit it, I was super lazy yesterday. I didn't even read much. I just watched the current governmental chaos play out on my twitter feed and some DVR'd shows while I crocheted a few more small cords. Then later in the afternoon I got a bit more focused and started the step by step photos for the tutorial. Don't worry, I plan on making a video as well, but that requires more preparation, so I started with the photos. This is the example piece I started with to teach just the basic loop.
That's likely where I'll begin and I'm starting to think this might have to be a series of short tutorials to cover everything without overwhelming me. I should get some alone time this afternoon to try out a video, but that all depends on other people's plans, so we'll just have to wait and see I guess.I also plan on trying to actually read some more today, I'd hate to waste the school break too much.
Wednesday, January 25, 2017
That's Done

I think today I'm going to start figuring out exactly what to teach and how I want to do so, so if there's anything in particular anyone would like me to focus on, please do let me know and I'll try to make sure I do. I've no clue how long it's gong to take me though. It could be a couple of days it could be a couple of weeks. I'm super rusty with the whole tutorial thing, so here's hoping I get my act together.
Tuesday, July 9, 2013
A Little How To For You

 The next one I did was this one with lizbeth in medium fern. My phone camera has a devil of a time capturing greens and blues properly, so you'll just have to trust me that the colors looks better than it is shown here. I was so frustrated with this picture yesterday that I didn't even bother to share it about, not frustrated enough to get out the good camera, but still.
I was asked and answered a question about these yesterday that I'll repeat here. Can you do this with any charm? Of course you can, you just need a properly sized hoop finding to tat around. I was also asked for the pattern and I must confess that there never is one for these, but I can tell you how to do it yourself. You just tat around the wire adding picots at intervals of 3 or 4 double stitches. Make sure to count your picots when you finish the hoop to determine how many picots to skip to make a nice symmetrical design. Then chain whatever number will get you a nice curve skipping one or two picots depending on the look you want. Occasionally I add a second round that weaves over and under the chains joining to the skipped picots or a thrown ring off a chain. It's all experimenting and it will be different with each ring. If you don't already know how to tat around a ring, a quick internet search for 'tatting around a ring' will result in a good amount of graphic tutorials and videos of the technique.

I did work a bit in the evening on the necklace I was suppose to be working on, but I'll need to finish that today and I might get creative again, just to get it all out of my system, or more likely I will get distracted preparing to vacation. Only time will tell.
Wednesday, August 24, 2011
Newest Instructable: Needle Tatted Chainmaille
 Sometimes an impulsive comment like, 'I might make this my next Instructable.' turns into an actual thing without much planning on my part. After schooling and laundry and the wunderkammer were all done yesterday I sat down with my tatted chainmaille again. As I worked I realized how simple it would be to get shots of the construction as I worked since each ring works up quickly. So I stopped weaving and got a surplus of rings made up so I could do just that.
You can find the tutorial up on Instructables here: Needle Tatted Chainmaille if you're interested in working one of these up, though if you're already a tatter and know even a little chainmaille, you will likely have already figured it out already or can now that the idea has been presented. That's the point of posting on Instructables though, it's for those who aren't tatters, those that need to see the off center things you can do with the art before they give it a go. I have been so very fortunate to reach such a large uninitiated audience there...I love Instructables.
I got back to the scarf once that was posted and it's at about 25 inches right now. I figured I would just going until I run out of yarn and hopefully I get at least three feet, four would be nice. I'm not even certain that this will make it into the shop at all. I guess I'll make that decision when its done. I do have to take a break on it now so I can work up a custom colored necklace for one of my favorite customers. I still don't think my shop is fully awake yet though so I should be able to finish the scarf soon.
So to recap, the tutorial was yesterday's task and today is just making, though I am still tossing around the idea of making a quick video of making the ring needed for the chainmaille since it is a true ring, not the usual mock one generally used in needle tatting, but I'll just wait until I'm better motivated to do so, or someone actually asks. I have also had another streak of custom item inquiries where the customer doesn't get back to me at all and I fear that they will all return at the same time, though actually that would be awesome for business, so forget about that fear thing I just said. Wait, no, it still scares me, but it's unlikely to happen, so I'll just take a deep breath and hope that future inquiry discussions actually come to a conclusion at all, whether it be to move forward or not. It's the not knowing that causes all the stress. Crap, I'm rambling again...I'll just leave now before it gets worse.
Friday, June 17, 2011
New Tatting Video
In lieu of chatting today, I'll just show you what I did yesterday. Well, I'll chat about it a bit first I suppose. This isn't my best video by a long shot, but after being hounding by many folks I thought I'd do up a quick demo on two color needle tatting. This is of course just one method and there are several and I should have gone into the differences between tatting off the ball and with the cut thread, but I didn't really plan it out in advance, so this is what you get. I suppose I might go back and do it again better, but it really does take forever to make these videos. Oh and don't anyone go thinking it was their fault for pestering me into doing this. There were literally dozens of requests over the last few months and after I make a quick video of the swallows visiting my house, I guess I was in the mood to give it a go.
I hope this is at least a little helpful. If you're looking for a quick written explanation on two color needle tatting, I'd suggest Barbara Foster's book Learn Needle Tatting Step by Step because that's where I started. I do think the next video will be on tatting with cut thread by working up a one shuttle pattern. I just need to decide on a quick one, maybe just a string of rings.
Friday, March 11, 2011
New Instructable
I decided to try and stay on task and get some sold things remade and since I was starting with the barefoot sandals, I kind of veered off task a bit to take pictures of the creation. I have been meaning to do an Instructable on them for quite some time but I never seemed to make the time. Why would I bother doing an Instructable when I have already posted the pattern? Well, it's because the audience there is completely different from my usual tatting friends. Doing these allows me to introduce tatting to new people in a much more visual way. I can step out processes like joining together a first and last ring which seems to stump folks. Heck doing these is what got me to make the short videos and those have sucked in countless new tatters so it really is a win.
 You can find it here and the wonderful people over at Instructables have featured the tutorial on there main page as well. This just exposes it to way more views and again that's wonderful. Of course this does not help me remake pieces that need remaking, so I must get back to that today. I also had a request this morning for a great many pieces to send overseas. I'm a little hesitant as it is a very large order with a small discount I offered before I knew just how large the order would be. There is also the matter of shipping all this stuff. I've not worried about my small packages being considered a commercial shipment before, but this one seems to cross that line and I'm not certain I know how to handle all that. Of course if I ship with UPS, I think they handle all that business and I just have a huge shipping cost which I would of course have the buyer pay...maybe I can do it. I think there is more thinking involved here.
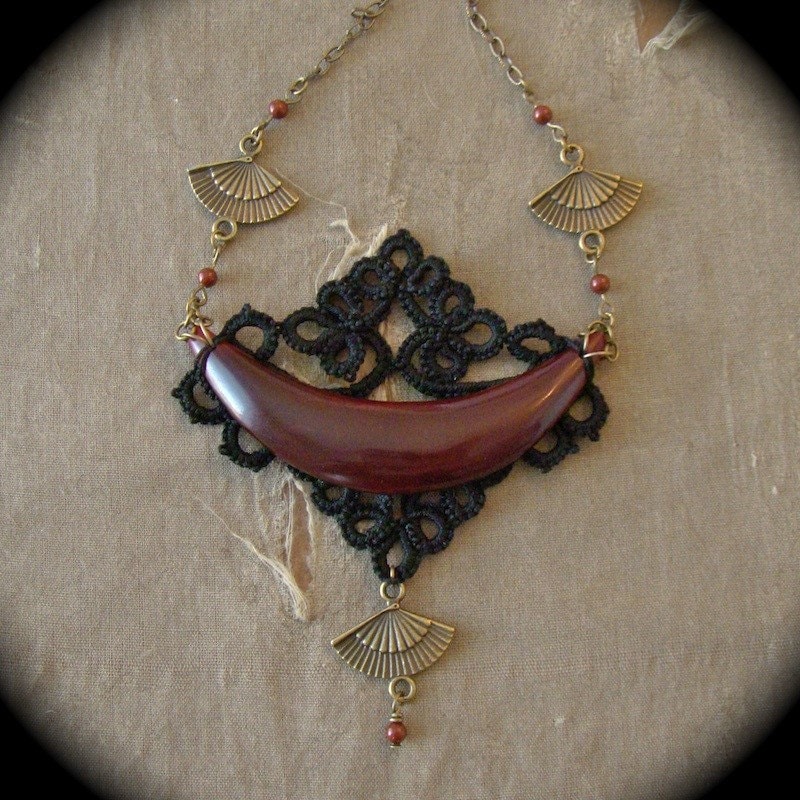 I also got the two pieces with bad pictures listed with better pictures yesterday. The first one up there is the redone piece. I really am so much happier with the way it hand now. I still has the same belly dance flavor with the bells, but now it's much more wearable and supported by the extra chains. The other is also listed and it too has a nice weight to it, but still hangs very well. I suppose I've just gotten better at assembling chains and my tatting over the past few years. It was bound to happen, practice and all that. Anyway, I'm going to go stress over that crazy order and get the day started.
You can find it here and the wonderful people over at Instructables have featured the tutorial on there main page as well. This just exposes it to way more views and again that's wonderful. Of course this does not help me remake pieces that need remaking, so I must get back to that today. I also had a request this morning for a great many pieces to send overseas. I'm a little hesitant as it is a very large order with a small discount I offered before I knew just how large the order would be. There is also the matter of shipping all this stuff. I've not worried about my small packages being considered a commercial shipment before, but this one seems to cross that line and I'm not certain I know how to handle all that. Of course if I ship with UPS, I think they handle all that business and I just have a huge shipping cost which I would of course have the buyer pay...maybe I can do it. I think there is more thinking involved here.Friday, July 2, 2010
Fresh Video
Ha, I get another pass because I made another video. This is just my 'learn needle tatting with my flower pendant' video, but with talking again.
Thursday, July 1, 2010
What Videos
So in lieu of answering all the feedback I got the day before yesterday, you just got the video, but I did in fact read all the video and tutorial suggestions. I got some for two color tatting, Victorian sets, the split rings and some more general tatting tips if you will. What I think I may do is start with an intro to needle tatting video. Basically tell folk what tools they need, where to get them, what books and sites I recommend for beginners and some finishing tips. This seemed like a good place to start, however it will require that I actually film myself talking and I might put that off until I get my hair prettied up. Yes, I know that's terribly vain of me, but I'm gonna put my face on youtube, I'm gonna look my best. Then I'll follow that up with a series of short videos with the intention of creating a little library of TotusMel tatting. No, I have no idea when you might be expecting all this to happen, but it's on the list to be created. I also don't want to over saturate the Internet with my presence so I might just drop them weeks apart for breathing room. If you have any more suggestions on what might make a useful video, please do let me know. I'm certainly not making these for me.
As far as the tatting goes, I finished making up a pair of my tatted spats even though I had already listed them as a custom piece. You see Coilhouse magazine is about to ship and my first print ad is it and that ad is a picture of those spats, so I thought it prudent to have a pair made, just in case the ad actually has an impact. Now I have heard that advertising works best upon repetition, so I actually bought four issues worth of ads hoping that the effect would take hold. So that being said, I don't really expect a huge impact from it the first go round, but better safe than sorry. I think I'm going to work on getting another Sepia piece made up today, likely the Woman bracelet and if it goes quickly I might make another up in the Black Tie colors as well to list. Oh and if you're interested I'm still running a Face Book Fan sale, the details are listed on the page.
As far as the tatting goes, I finished making up a pair of my tatted spats even though I had already listed them as a custom piece. You see Coilhouse magazine is about to ship and my first print ad is it and that ad is a picture of those spats, so I thought it prudent to have a pair made, just in case the ad actually has an impact. Now I have heard that advertising works best upon repetition, so I actually bought four issues worth of ads hoping that the effect would take hold. So that being said, I don't really expect a huge impact from it the first go round, but better safe than sorry. I think I'm going to work on getting another Sepia piece made up today, likely the Woman bracelet and if it goes quickly I might make another up in the Black Tie colors as well to list. Oh and if you're interested I'm still running a Face Book Fan sale, the details are listed on the page.
Wednesday, June 30, 2010
Needle Tatting Split Rings & Josephine Chains
I totally get a pass on today's blog. Why, you ask? Because I did a tutorial video yesterday and I get to post that for you. This one is on split rings and Josephine chains and is already linked over in the pattern list in the right column. I got the filigree pieces in to remake the Copper Princess necklace and used the the chain portion of that to film. Also, I talk in this one and according to early feedback this is a good thing. In fact, I may redo my other video with the talking as well since I apparently do not sound like an idiot...unless they're all lying to me and I do sound like an idiot.
The video is also posted at Instructables if you'd like to go rate it there. I may also go ahead and do a series of these though they do already exist by other folks. I suppose sometimes having a choice of who to learn from is a good thing.
Monday, January 18, 2010
A New Instructable
I know that I said this was going on a long list of tasks and would likely not be complete any time soon, but the kids were gone, it was quiet and it seemed a good time to get some pictures of the pearl technique and post some instructions. So here it is in all it's glory.
Pearl Necklace Makeover With Tatting - More DIY How To Projects
You can definitely use this technique with any other large beads, crystals, heck whatever suits your fancy. It's far too basic for me to be the first one to give it a go, so I claim no such rights to it. I imagine it can also be done with a shuttle, but I don't have a clue how you'd load such large beads onto a shuttle. Tatters of the shuttle variety, if you're so inclined to share how that would be done, I can add that to the instructions. I've got a few more surprises and announcements that might be spilling forth soon, but I don't want to get ahead of myself, so I'll just leave it at that for the day. Now go and destroy a necklace...it's fun.
Friday, April 10, 2009
Do You Like To Watch?
Apparently I was not done sharing as I have now recorded a video of myself needle tatting my flower pendant, warts and all. It's not fancy and I got rid of all sound to avoid the lovely breathing noises I was making. I thought about adding music, but figured that I would be the one person to get in trouble for doing so. So if you need to watch hands to learn tatting or just want to watch for the sheer 'thrill' of it, I present: Me needle tatting.
The video is also available over at instructables as a companion to my beginners tutorial where you may comment and rate it to you hearts content.
The video is also available over at instructables as a companion to my beginners tutorial where you may comment and rate it to you hearts content.
Thursday, April 9, 2009
Another Instructable
I've been getting some interesting correspondence lately both asking for tatting help and my patterns. If you've been around me a while you know that I am terrible about writing down patterns. I'm lucky that selling my pieces requires me to take many, very good photos that I am able to work off of when remaking things. Well, I decided that I needed to catch up on these things a bit. I took the morning after making yet another mask to write out the pattern for my slave bracelet for someone who asked very nicely. Then, since I was on a roll and needed a break from the dreaded remaking, I decided to finally do another instructable.
This one is slightly modified from my fleurette necklace to show off three new techniques after my beginners project of the tatted flower pendant. It will teach you how to do Josephine knot or spiral chains, split rings and clovers. This is my third actual tutorial on instuctables and if you ever feel the need to share a skill or project I highly recommend them. It's a very user friendly interface and I've found that it exposes me to an entirely new audience rather than the same crafters. This has gone a long way in getting tatting out into, well not quite the mainstream, but a bit closer anyway.
Here's the instructable for your edification, but please if you get a moment stop by the actual instructable to rate it and comment for, well let's be honest, my ego. Thanks!
Needle Tatting A Necklace - More DIY How To Projects
Friday, February 20, 2009
While I Was Away
In case you were wondering, I got out of jury duty because I have an appointment next week to finish my root canal. Not my favorite way to get out of jury duty, but this was going to be a long trial so I'll take it. When I got back, I was so excited to see all the comments left regarding my tatted spat/anklet thing. I spent the evening looking through the myriad of shoe options you amazing folk left for me. Wow, you are great and I think I found the perfect pair for displaying the spats as well as a couple of others I now want for no good reason other than they're pretty.
I also got some fab ideas for future pairs. I think I'm gonna go ahead and make up the second one for this pair and then get to work on a longer pair that will go up the leg a bit more as well as down the foot more. Then next on the list will be essentially the shoe equivalent of my slave bracelet, because I like the idea of a barefoot sandal too. How soon you can expect to see these creations is anyones guess however. I seem to be always biting off more than I can chew.
Also a lovely surprise I discovered after jury duty was the spread of my tatting instructable. I had already had a lovely comment the other day from the needlework editor of craftgossip that she was posting the tutorial there, but I returned to find my google alerts had even more postings. It is also now featured on the Craftzine.com blog and at The Point NYC website. And to think I thought I was going to have problems getting the word out on that one. I even had one of my twitter buddies give it a shot using an embroidery needle and she shared her first try. I have to say I'm impressed not only with the first attempt, but that my instructions were clear enough for a beginner to create the piece in just a few hours. I am also so glad that she shared and I hope that anyone who attempts this pendant, my scarf pattern or my mask will show me the results!
I will, in the future, offer more patterns and projects for you to digest, but I want to space them out a bit. I've already got an idea for some more beginner techniques to share that will take people beyond the flower pendant, but again I'm in no hurry to create my own huge library of learning. For those of you who want to learn more right now, I have a few sites to suggest. First Bella Online, I've picked up tons there, lots of links and patterns and whatnot. Then there's HandyHands Tatting where you can find some lessons and get supplies. Last, if you're looking for some personal help, try etatters ning network. It's beginner friendly with tatters from all levels. I know, another place to "join", but you can get some one on one help as well as browse a growing library of tatting pictures for inspiration. I think that's it for now. I'll see what I can make up this weekend to share with you on Monday.
Addition: Gina the Tatting Goddess also suggests this board for needle tatters as well. Thanks Gina
Friday, January 9, 2009
You Will All Be Tatting One Day
 Let me start off today with a little show and tell. Jane of Lamplighter has made yet another truly amazing light shade embellished with medallions she had me custom make for her. Her shades are spectacularly detailed and I am always honored to have a small piece of my work as a part of hers.
Yesterday while I was procrastinating instead of tatting masks, I read a post on threadsofatattinggoddess about why we blog and she made a comment about how there were so few tatting tutorials compared to say knitting or crochet ones. I have toyed around with the idea of doing how-to tutorials or videos, but I decided not to bother as they already existed online. I think I forgot that not everyone is a master of the search engine. If it is online I pride myself on my ability to find it. It hardly ever occurs to me that not everyone is as comfortable with searching as I am and just because I can find three different how-to articles doesn't mean that everyone else can.
Anyway, her post made me think that perhaps there were not enough different tutorials to choose from and adding to the pool may not be the waste of time that I initially assumed it would be. Do I think that I can do a better job than the others I've seen? No, not really. I'm not a photographer or videographer or a skilled writer, but I do know how to needle tat and maybe that's enough. I still have one more mask on order that I need to make up, but after that I plan on working on a basic how to needle tat and I will post it either here or more likely on Instructables since the site is pre formatted for such things. I just hope there are enough people curious to learn.
What's a little funny to me about my desire to convert people to the art of tatting is it was the lack of other tatters that brought me to the craft in the first place. I really liked the idea of being able to do something that few others could. I love the fact that people look at tatting like it must be some sort of magic and impossible to replicate. Even more amazing is the looks I receive when people actually watch me tat at full speed. I tell them it's not as hard as it looks and they never believe me. I do honestly want more tatters in the world. I want to see tatting embellishing high end clothing and celebrities wearing tatted jewelry (preferable mine) and I would love to walk into a bookstore and actually find a tatting book in stock. I refuse to believe that this is a dying art and I will do what little I can to keep it alive.
Subscribe to:
Comments (Atom)


