


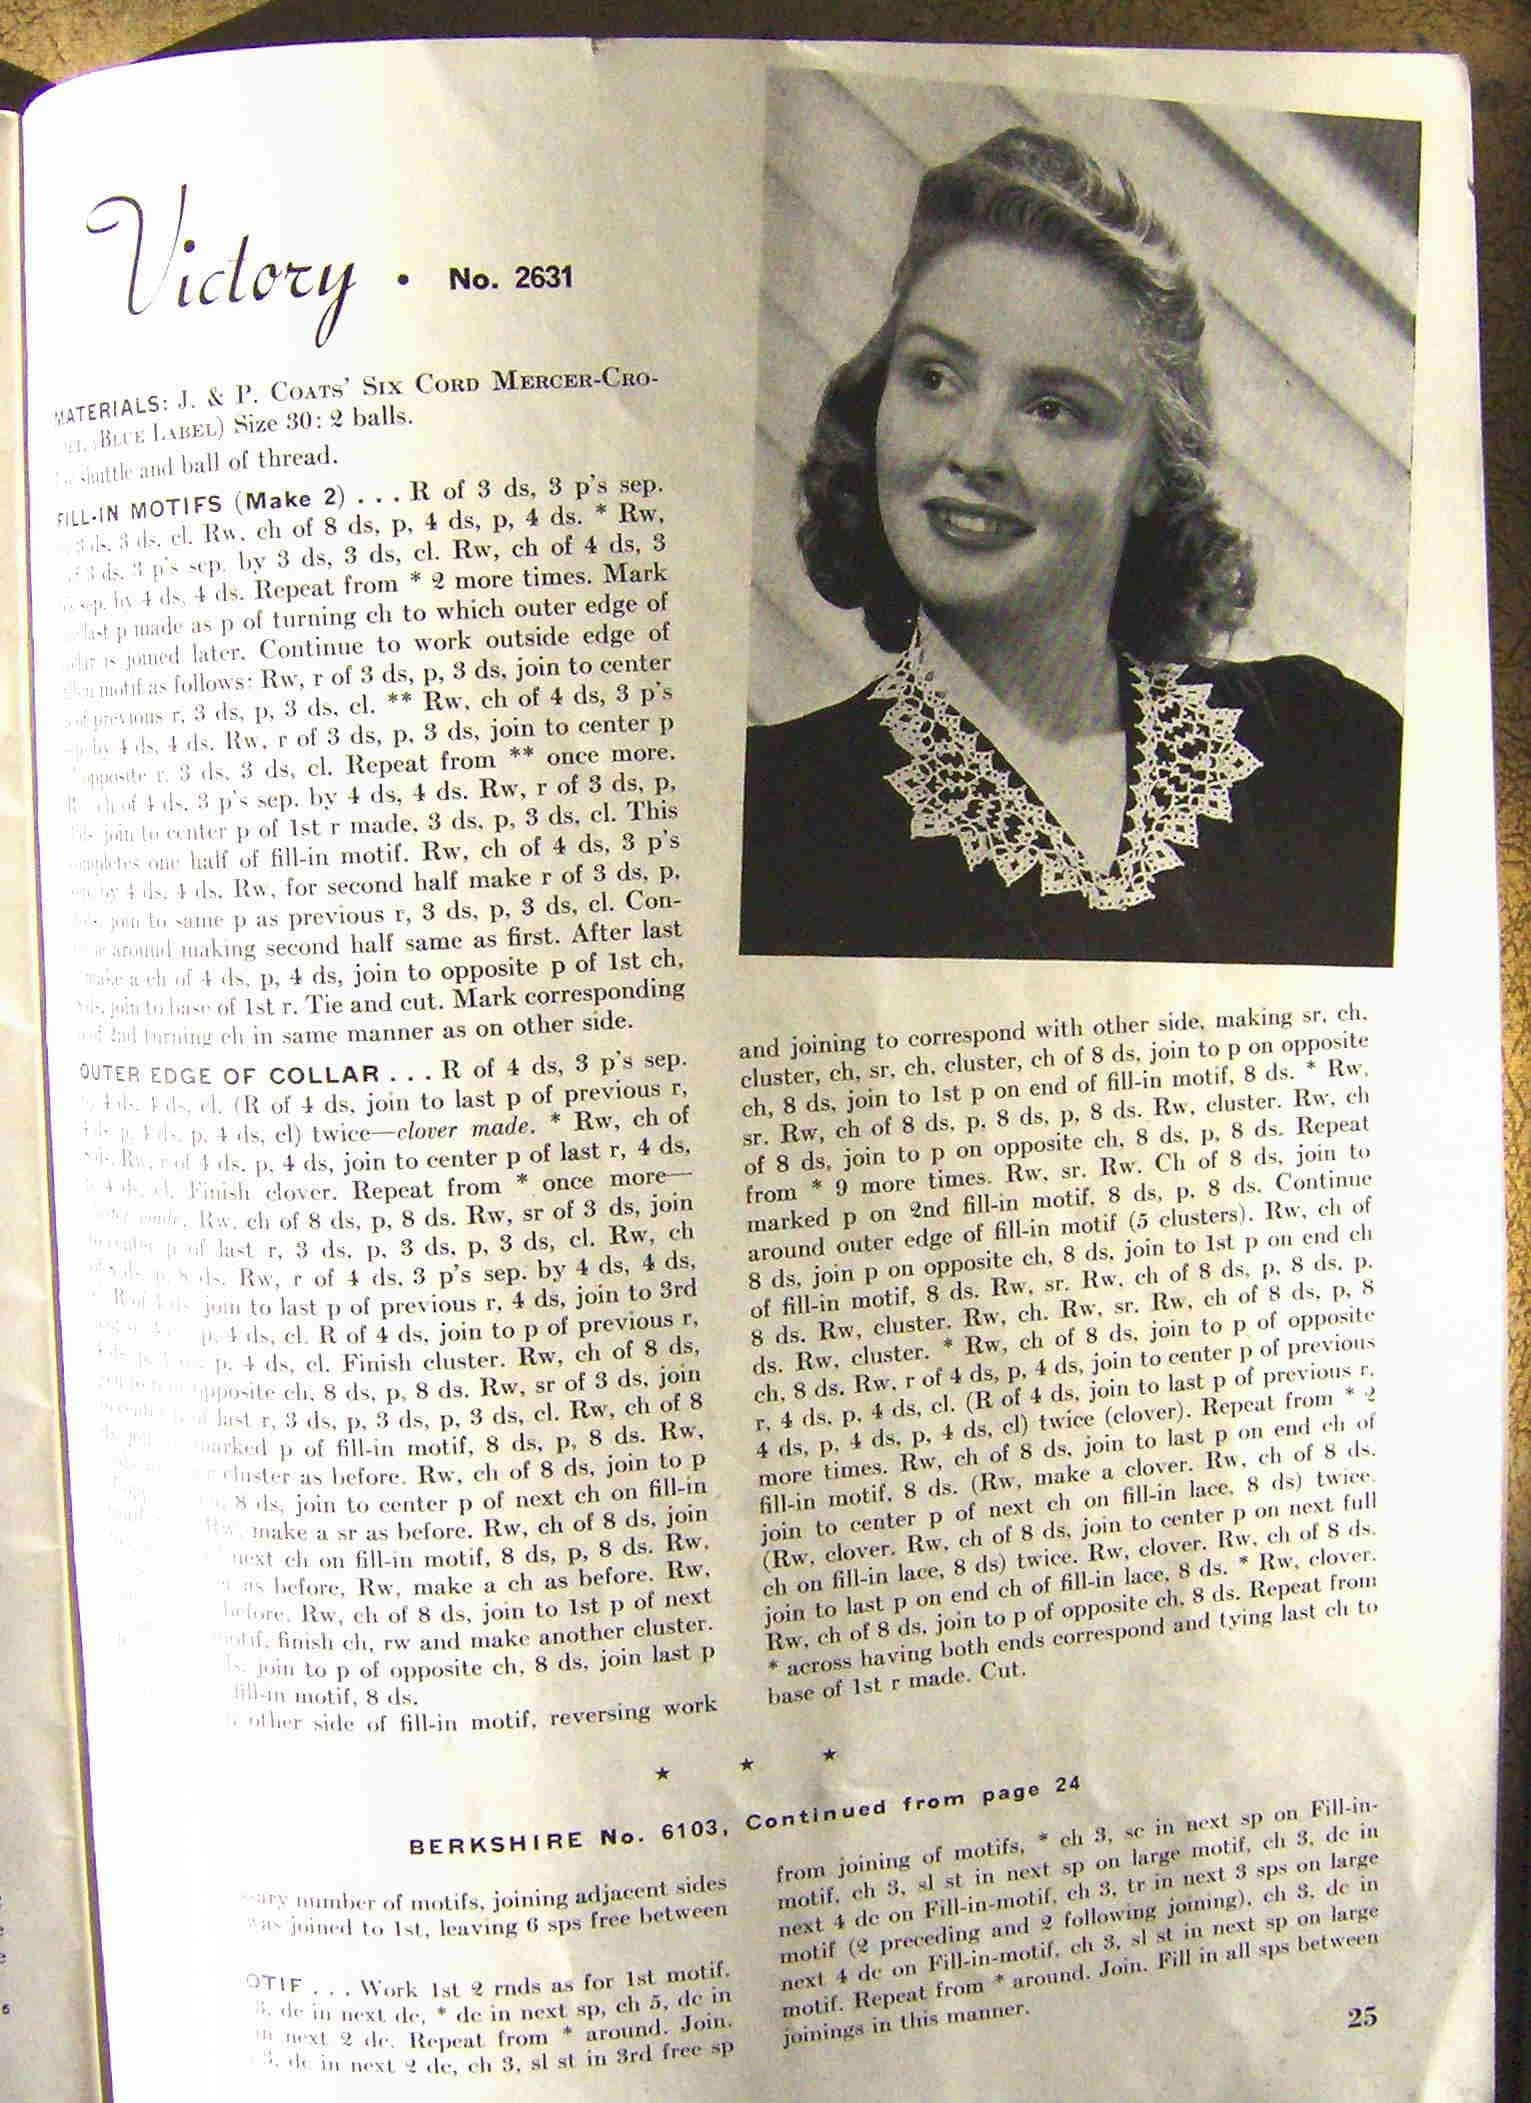
 So, I had intended on making this piece's debut here today, but I got antsy and listed the necklace at etsy yesterday. I would still love to share with you the evolution of it though. It all started when I saw this booklet on sale at etsy. The seller, ButtonEmpire, posted a few pics from the booklet and when I saw this collar I audibly shrieked. It was perfect and I couldn't wait to make it. Of course I had to wait...a whole week for the book to arrive from Canada complete with another little booklet of doily patterns for another day.
 The first step was following the pattern as written and making a prototype piece so I could see what needed to be changed. I actually needed to make a couple of changes along the way as the pattern has the whole top edge of the collar tatted together and that clearly wasn't going to work. The whole piece needed to be pressed as well before success was clear. Then I lay out the piece and work out any changes that are needed, in this case I added a small ring on the top center as well as changed some stitch and picot counts so it would lay better. You might have noticed that the fill-in motif is exactly the same as the one in my Portrait necklaces. That made construction a snap for me, though the clover clusters take a bit more time to tat up.
The final step was working out where to embellish the piece and load on the beads. I decided that I wanted this piece to be very familiar so I went with the same basic beads as the Portrait necklace though I did add some seed beads this time. Next was the name, this took me forever. I wanted to make sure that the name was based on the original patterns name, Victory, but I also wanted it to fit in with the Portrait name as well. I settled on The Countess Was Victorious and took some quick photos. I hope that you like it!

This is certainly not my last piece from this booklet and I'll be sure to share them as they evolve from their original forms into Neo-Victorian tatted goodness.


2 comments:
LOL! I have this pattern earmarked for use too. Not as a collar but there are parts of it that have inspired me for something else.
:-) gina
I have this pattern, too! Twice! I have the original vintage booklet it came from and it's also in "A Tatter's Treasure Chest of Patterns". I love how you've transformed it!
Post a Comment